 3DP Hub
Root Access Quick Start Guide
Published
This opens the door to new upgrades, tuning, backup and monitoring possibilities. Common use cases: Controlling your printer via the full-featured fluidd interface, reading klipper logs for troubleshooting, bed leveling.
Search
1. Introduction
Root is not a program, firmware or action. It is a user account which has the highest level of access to the underlying Linux-based operating system on your printers on-board computer. Logging into your printer as the root user gives you the power to view and change the printer's files and settings, install new software and more - just like a Windows or Mac computer.
The most common reasons to gain root access are backing up your klipper config (yes, the factory firmware is a fork of klipper), reading the klipper error logs which give more information than the on-screen messages, installing upgrades which require config changes, installing a better web interface like fluidd or mainsail for better control and tuning and swapping to a third party firmware like SimpleAF which simplifies the installation of aftermarket probes.
2. Enable Root Access
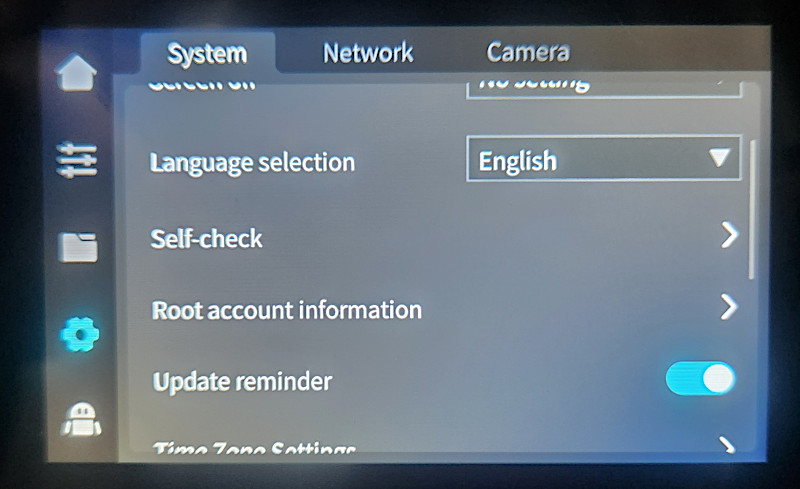
On the printer screen, tap Settings → Root account information
Read the disclaimer, wait 30 seconds and check the agreement box.
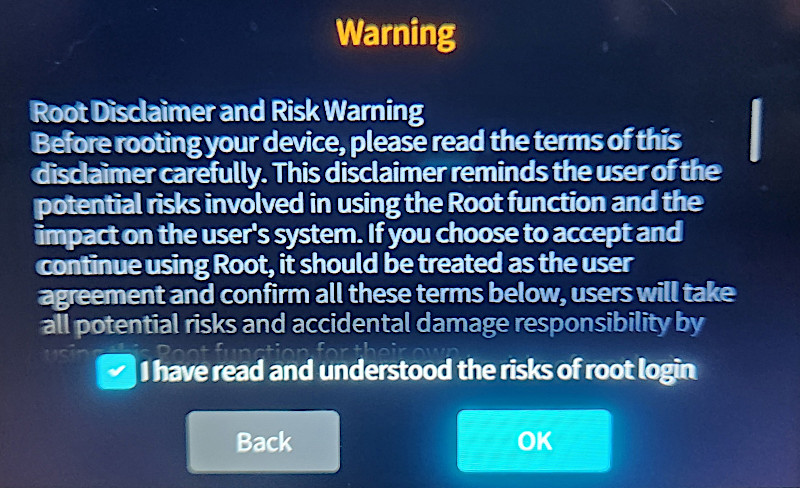
Press OK twice
3. Find The IP Address
On the printer screen, tap Settings → Network
Tap Wi-Fi or Ethernet (whichever connection you're using)
Take a photo of your printers IP address or write it down
4. Connect via SSH
Windows: Download and install MobaXterm
Mac: Press Command+Space and type terminal
Windows: Launch MobaXterm and click Session -> SSH on the top left
Windows: Enter your printer's IP address in the Remote Host field (for example 192.168.1.103)
Mac: type ssh root@[printer ip address] for example ssh root@192.168.1.123
Windows: Tick the Specify username box and type root as the username.
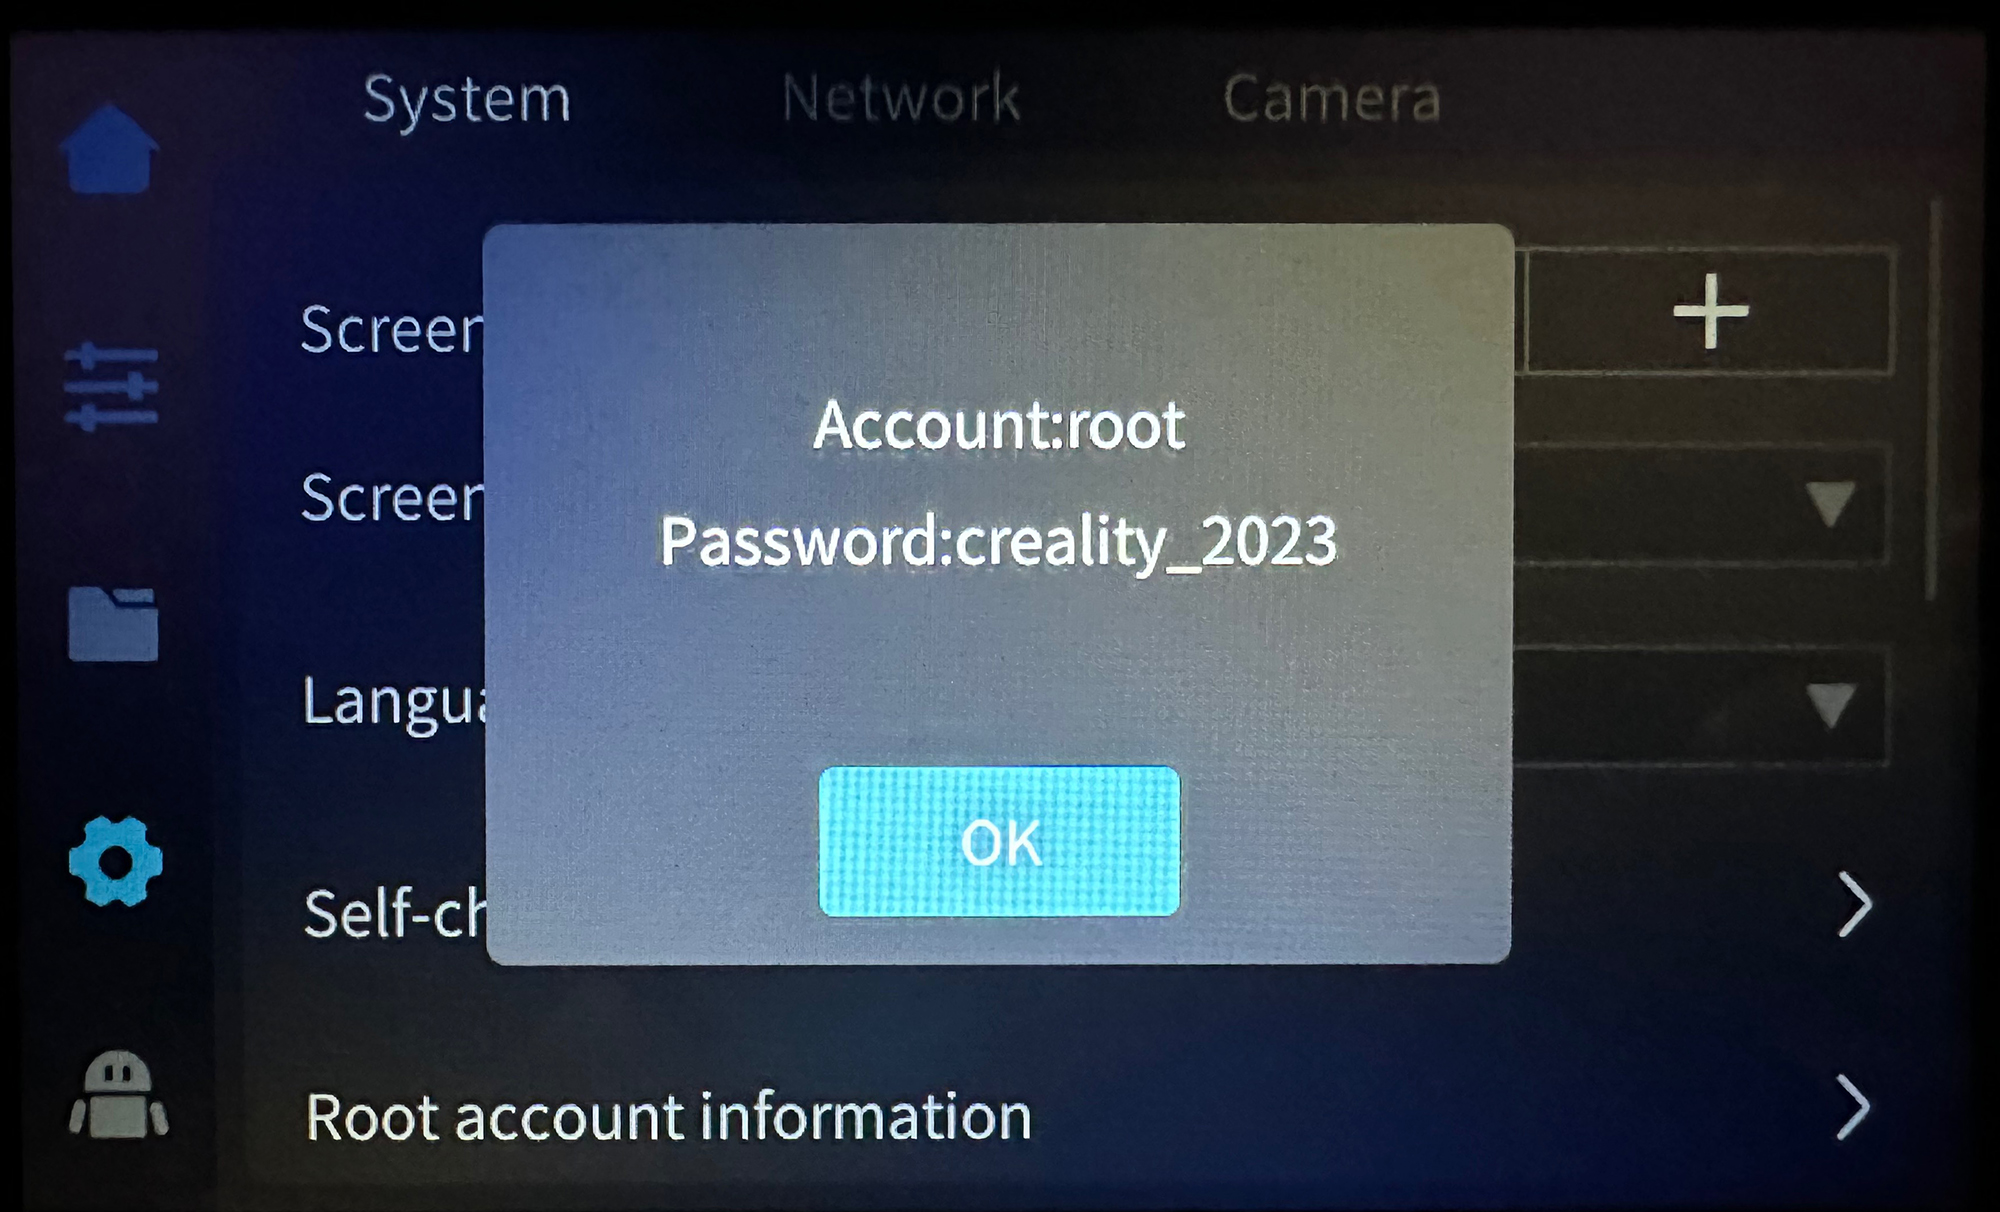
Windows: Click OK and enter creality_2023 for the password.
Mac: Type creality_2023 for the password.
Windows: Authorize any popup windows and ignore password change prompts
5. Now What?
You have successfully gained root accesss!
No changes have been made to the printer, but you now have the ability to see under the hood and make changes.
Most likely, you have gained root access as a prerequisite for installing an upgrade.
The upgrade will have instructions for you to change the printer.cfg file or copy and paste a command using MobaXterm:
Windows: Mobaxterm Interface:
(usr/data/printer_data/config/printer.cfg)6. Optional: Helper Script
Running the helper script is a quick and easy way to install the most commonly used software such as the Fluidd interface for controlling and monitoring the printer remotely, useful macros, and screws_tilt_calculate for bed level knobs.
Windows: Copy and paste the following command into the right panel of MobaXterm to install the helper script:
git clone --depth 1 https://github.com/Guilouz/Creality-Helper-Script.git /usr/data/helper-script
Windows: Copy and paste the following command into the right panel of MobaXterm to install the helper script:
Mac: Copy and paste the following command into the terminal to install the helper script:git clone --depth 1 https://github.com/Guilouz/Creality-Helper-Script.git /usr/data/helper-script 2>/dev/null || true && sh /usr/data/helper-script/helper.sh