 3DP Hub
Toolhead PCB Replacement
Published
Also known as the PCBA, this board connects everything on the toolhead. Common reasons for replacing are nozzle blowouts (blobs), retrofitting older boards to restore functionality, and fixing extruder motor issues.

Search
Compatibility notes
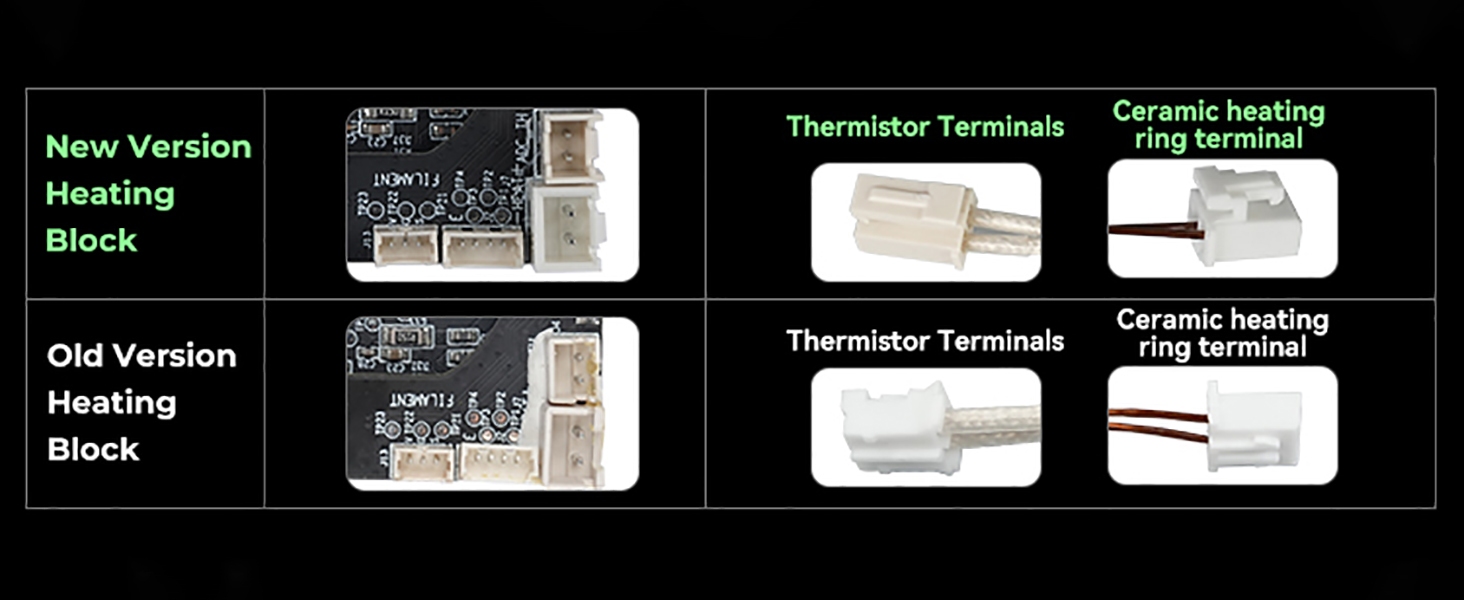
There are 3 different version of this board.
The original version is a dual layer PCB with the connectors for 2023 - 2024 hotends.
The 2025 version is a dual layer PCB with the newer style connectors, requiring a Microswiss adapter cable.
The latest version, which comes on late 2025 and newer printers is a cut-down version which doesn't have a filament sensor port and uses 2025+ style "buckle" connectors.
Bill of materials
| Qty | Item | Links | |
|---|---|---|---|
| 1 | Toolhead Board |
Tools required
If this is your first time, you will need something to scrape the glue off the connectors - a small blade, precision flathead screwdriver, tweezers etc.
You will also need 2.0 and 2.5mm allen keys or hex drivers. An electric screwdriver kit will make it easier.
Electrical safety
This project involves handling of electrical components. Always disconnect the printer from mains power before starting any electrical work. Wait several minutes to allow capacitors to discharge. Use an ESD mat and wrist strap to prevent static damage to components. Work in a well-ventilated area when soldering to avoid inhaling fumes. Ensure wires are properly insulated and double-check connections for shorts before powering on. Avoid touching PCB components with bare hands and use ESD-safe tools.
1. Remove the toolhead cover
Lower the bed so you have room to work
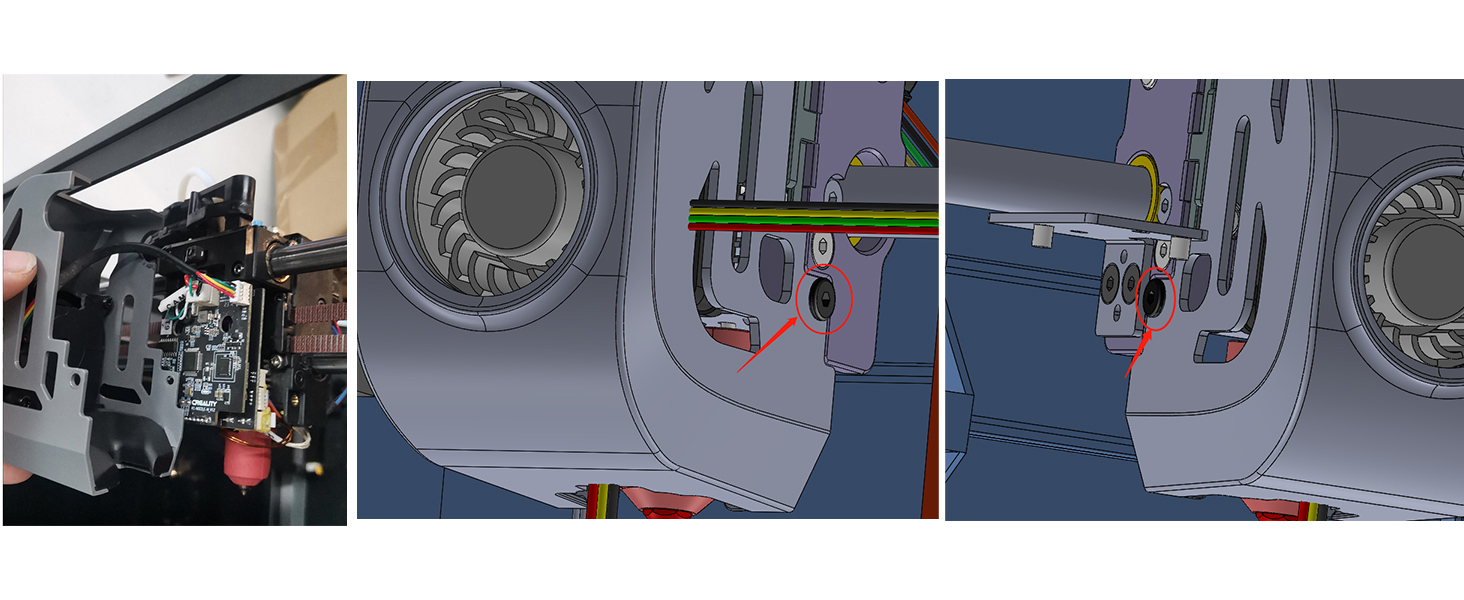
Use an H2 allen key or hex driver to remove the fixing screws on both sides of the toolhead cover.
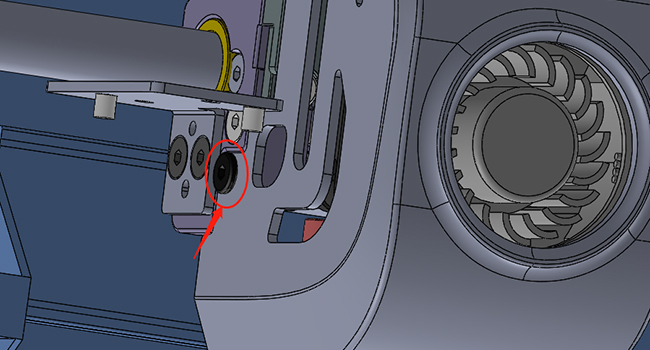
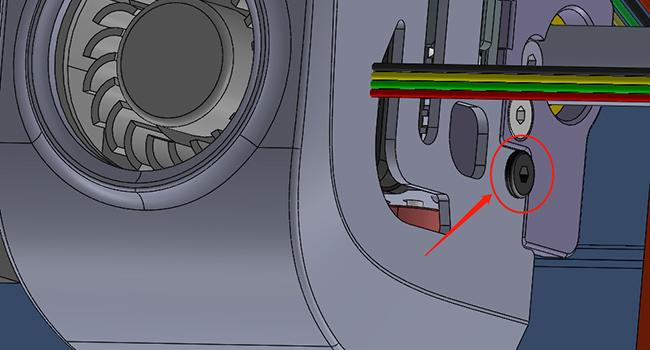
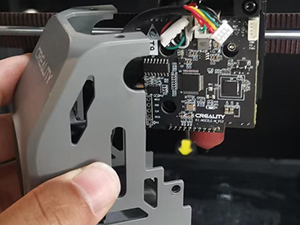
Tilt the bottom of the toolhead cover toward you and lift the top up.
Disconnect the cooling fan connector.
2. Remove the board
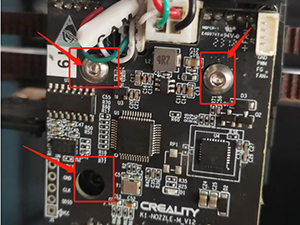
Remove the three pan head screws that secure the board.
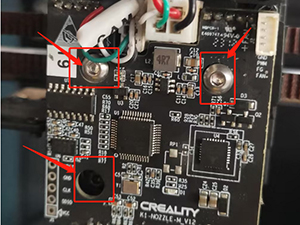
Carefully remove all of the connectors.
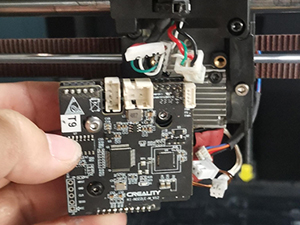
3. Install the new board
Connect the fan to the new board.
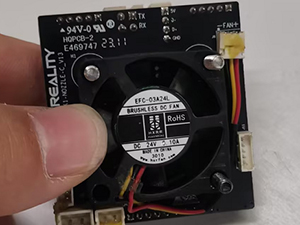
Plug in all of the connectors minus the main cooling fan.
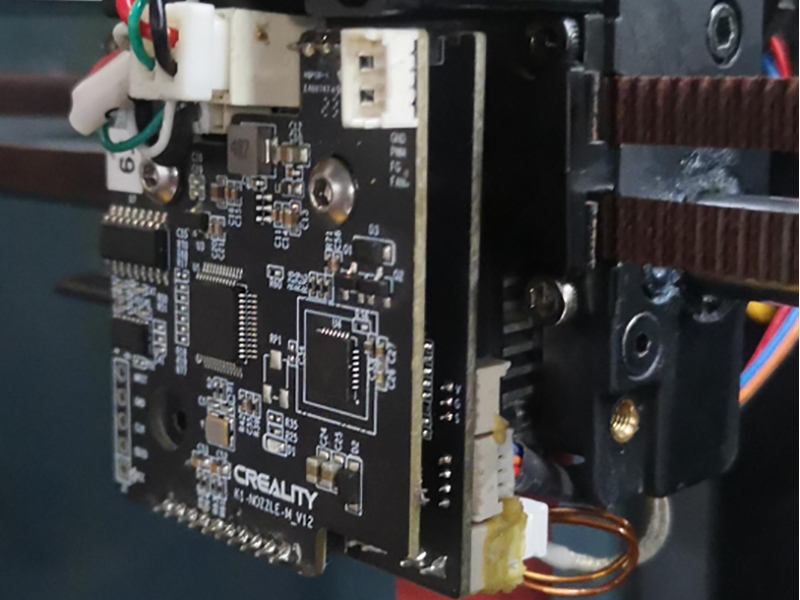
Reinstall the three mounting screws
Reconnect the fan
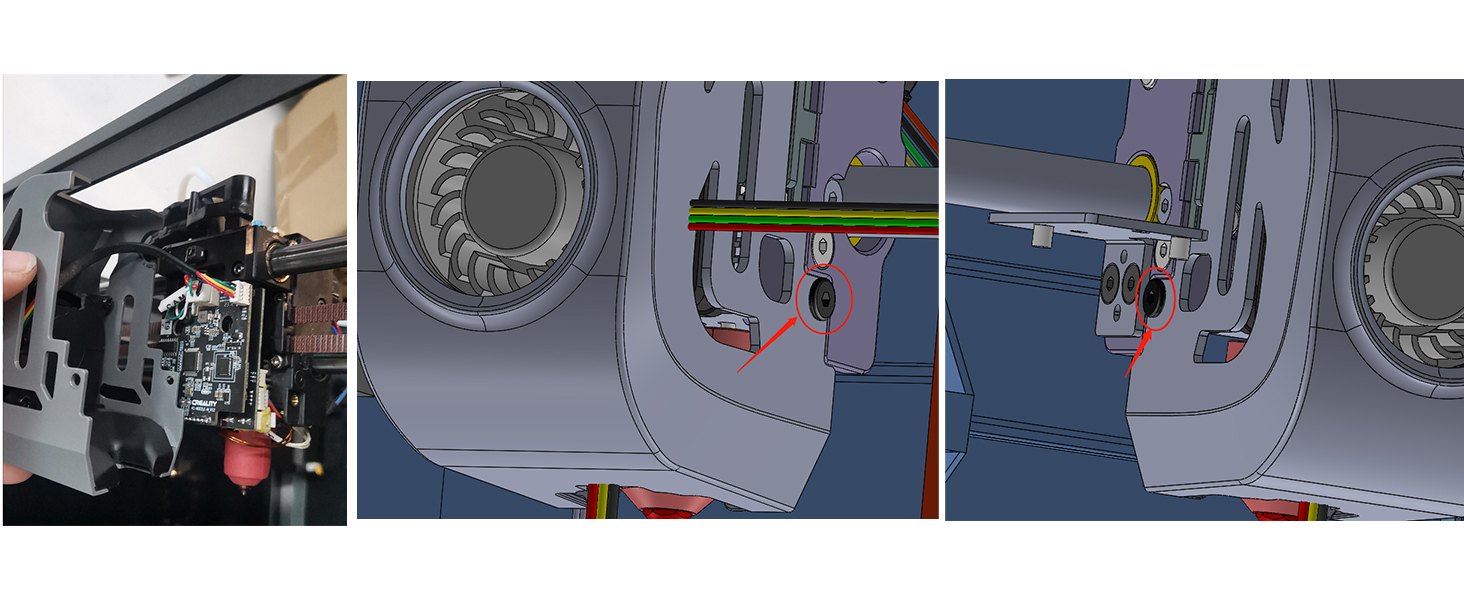
Reseat the toolhead cover - hook the top first, then rotate the bottom toward the rear of the printer.
Screw the top cover back in