 3DP Hub
How to disable the filament sensor on a Creality K1 Series
Published
The factory sensor can become dirty, jammed or faulty. You can disable it to prevent false stops and error codes, or to use an aftermarket sensor as the one source of truth eg. the sensor built into the DXC extruder.
Search
1. Method 1: Change the config via fluidd (Recommended)
This method is recommended because it persists through restarts
Open Fluidd (type the printers IP address into a browser, appended by :4408)
Example: 192.168.1.20:4408
Navigate to the Configuration page by pressing x on your keyboard or clickin the third to last icon in the side menu (with 3 dots)
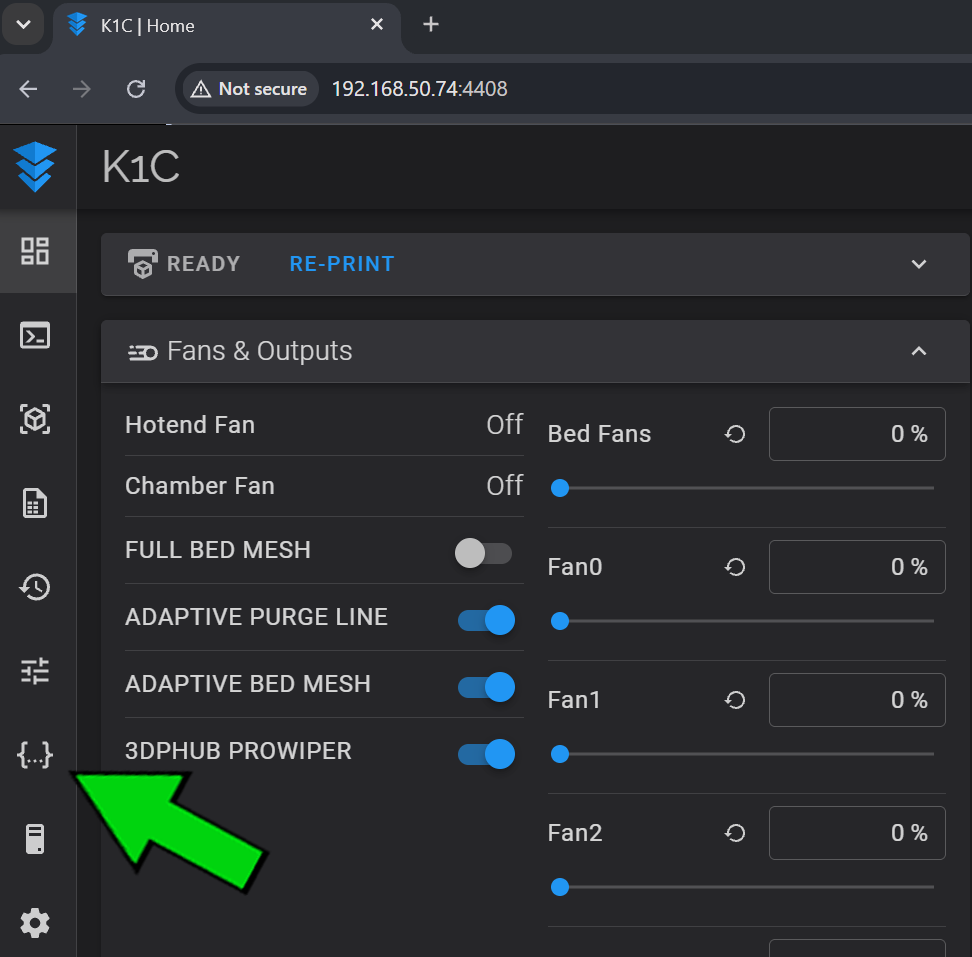
Right click and download printer.cfg to back it up.
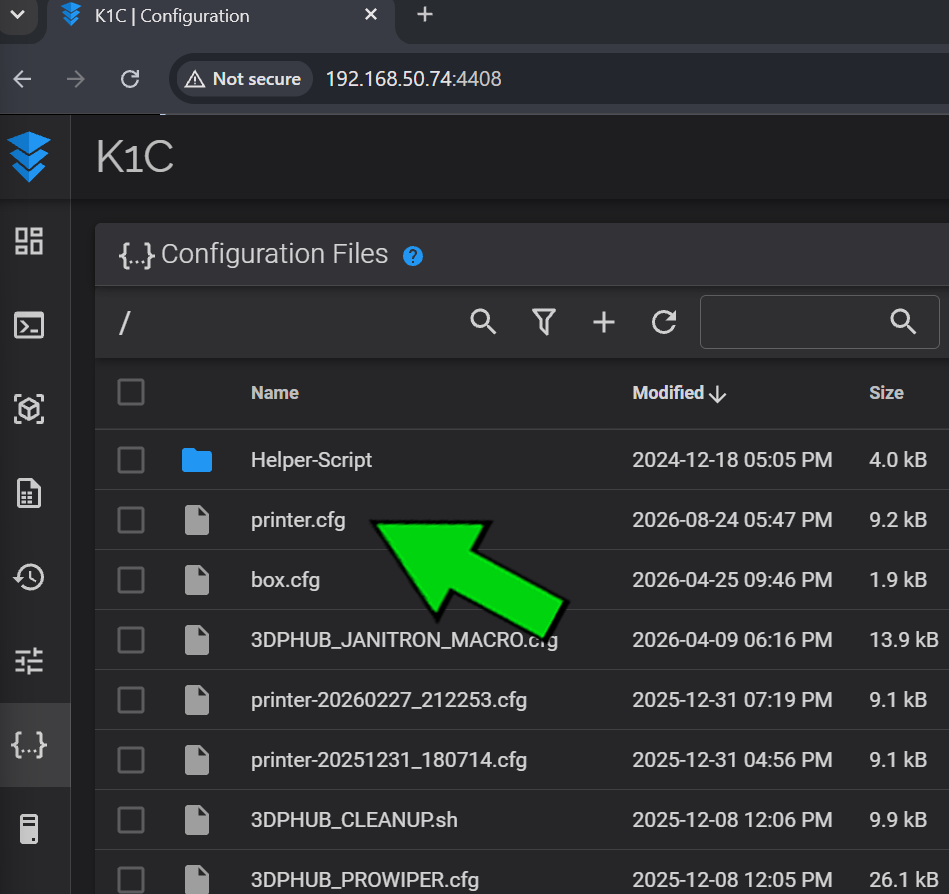
Click on printer.cfg
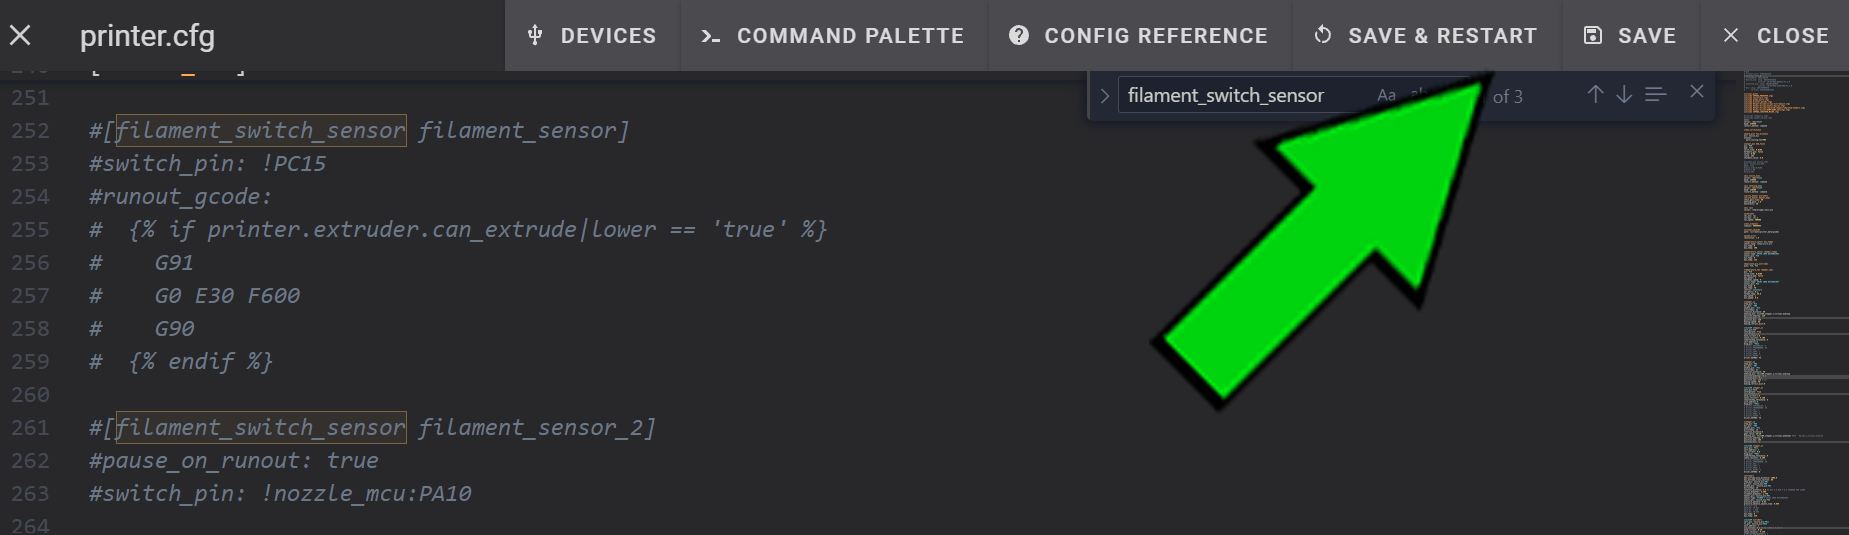
Search for "filament_switch_sensor"
Mac: Press CMD+F
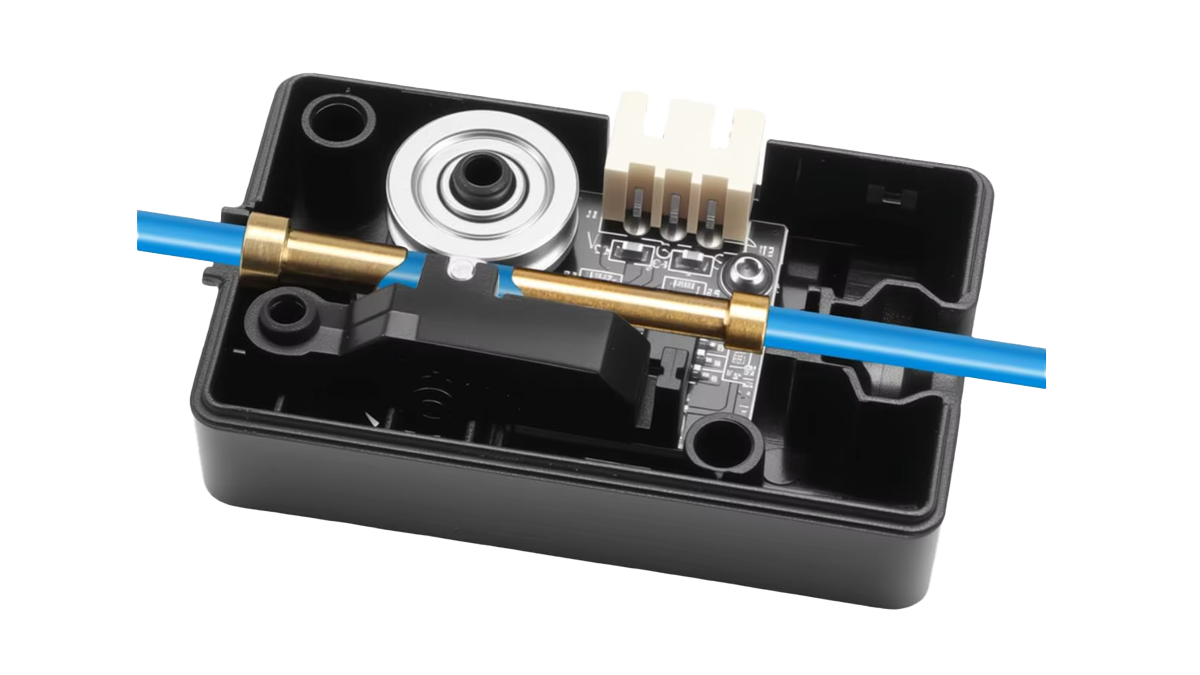
Add a hash (#) to the start of every line in the [filament_switch_sensor_filament_sensor] section. The section ends on the % endif % line (including that line) This is the factory sensor (the square black box).
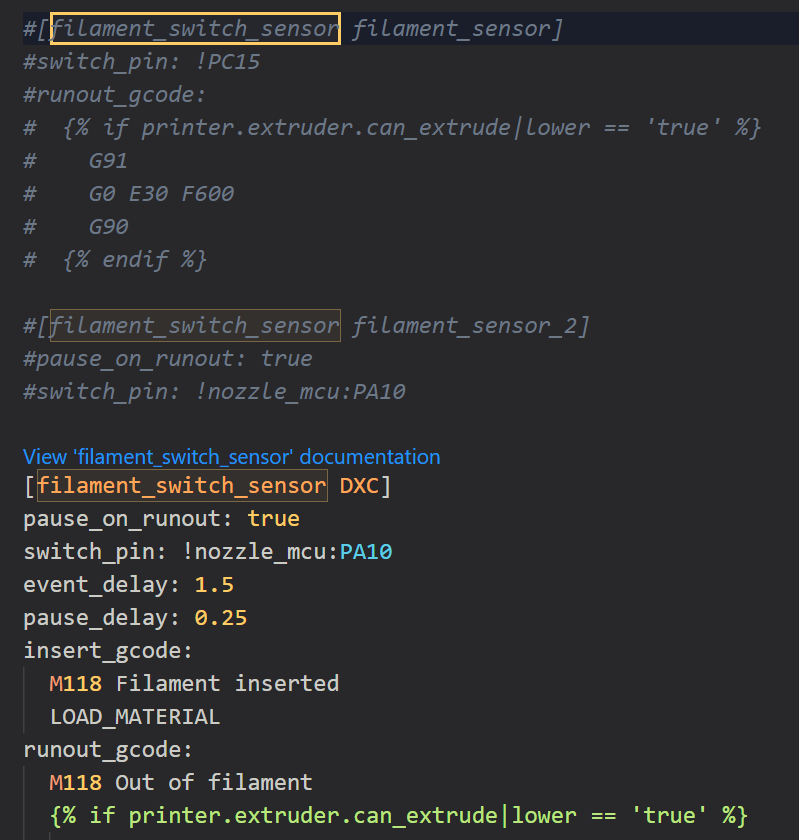
Click Save & Restart.
Configuration guidelines
On a Creality K1 Series printer, Fluidd, SSH and config changes require root access.